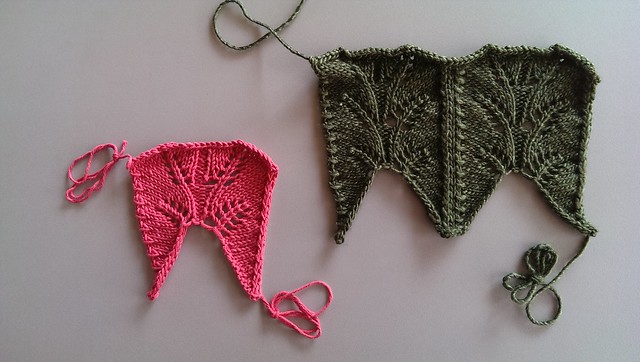
Teaching myself one new knit stitch a week from the Complete Guide to Needlework book, c. 1979, and other sources. This stitch is from the Complete Guide to Needlework.
These are my blocked samples - it was very curly before blocking! It was also tricky as heck to figure out how to yo for the first stitch before a slipped stitch, and a bit less tricky to yo as the last stitch. I just kinda winged it each time, never fully remembering what I'd done, so that part might not be right, but it looks ok to me! :)
It's a pretty, fairly simple pattern that would look nice on a scarf or shawl.
Using size 6 needles, I cast on 20 stitches:
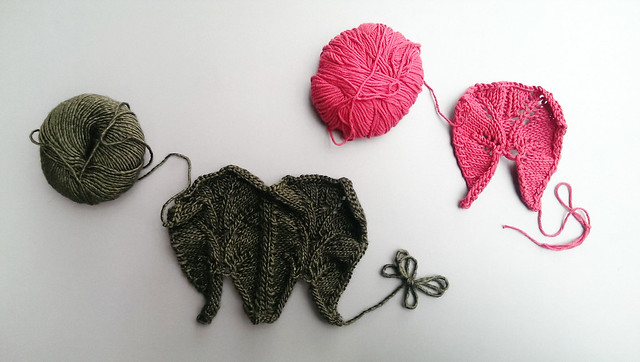
left: Elsebeth Lavold Baby Llama in Lime Juice
right: Knit Picks Wool of the Andes, Oyster Heather
Multiple of 10 stitches.
Row 1: *yo, sl1, K1, psso, K8*
Row 2 and alt rows: purl
Row 3: *K1, yo, sl1, K1, psso, K5, K2 tog, yo*
Row 5: *K2, yo, sl1, K1, psso, K3, K2 tog, yo, K1*
Row 7: *K5, yo, sl1, K1, psso, K3*
Row 9: *K3, k2 tog, yo, K1, yo, sl1, K1, psso, K2*
Row 11: *K2, K2 tog, yo, K3, yo, sl1, K1, psso, K1*